

HOW ZUVOLO WORKS
Get ready to start using Zuvolo. Connect with friends and start sharing your location. Or create events and activities, share registration codes, and monitor with ease using our web control room.
GetTING Started
1. Create Account

Ensure that you and your friends download the app and create an account.
2. Send Friend Requests

Once you are signed in, select the “Friends” tab. Search for friends and send them a friend request.
3. Accept Friend Requests

Accept friend requests that have been sent to you.
SHARING LOCATION
1. Select Yellow START Button

The yellow “Start” button is where all activities can be started.
2. Choose Activity Type

Select the “Share location with friends” option from the action sheet.
3. Confirm Permissions

This will appear the first time you attempt location sharing. Zuvolo will always require this permission to be set to “allowed”.
4. Target Your Location Sharing

You can decide exactly which friends will be able to see you on the map.
5. Select “Start Activity”

Location sharing will now commence.
6. You’re On The Map!

Your friends will now be able to see you on the map, and you will be able to see any friends that are sharing their location with you.
creating Events & ACTIVITIES
Important: The Zuvolo portal is designed to be used on a desktop computer and not on a mobile phone device.
PART I: Creating an Event
1. Sign In To The Portal

You can use the same account that you use for your app. Or register on the portal first.
2. Select “Add Event”

Then enter a name (mandatory) and a description (optional), followed by the correct dates for your event.
3. Upload a GPX
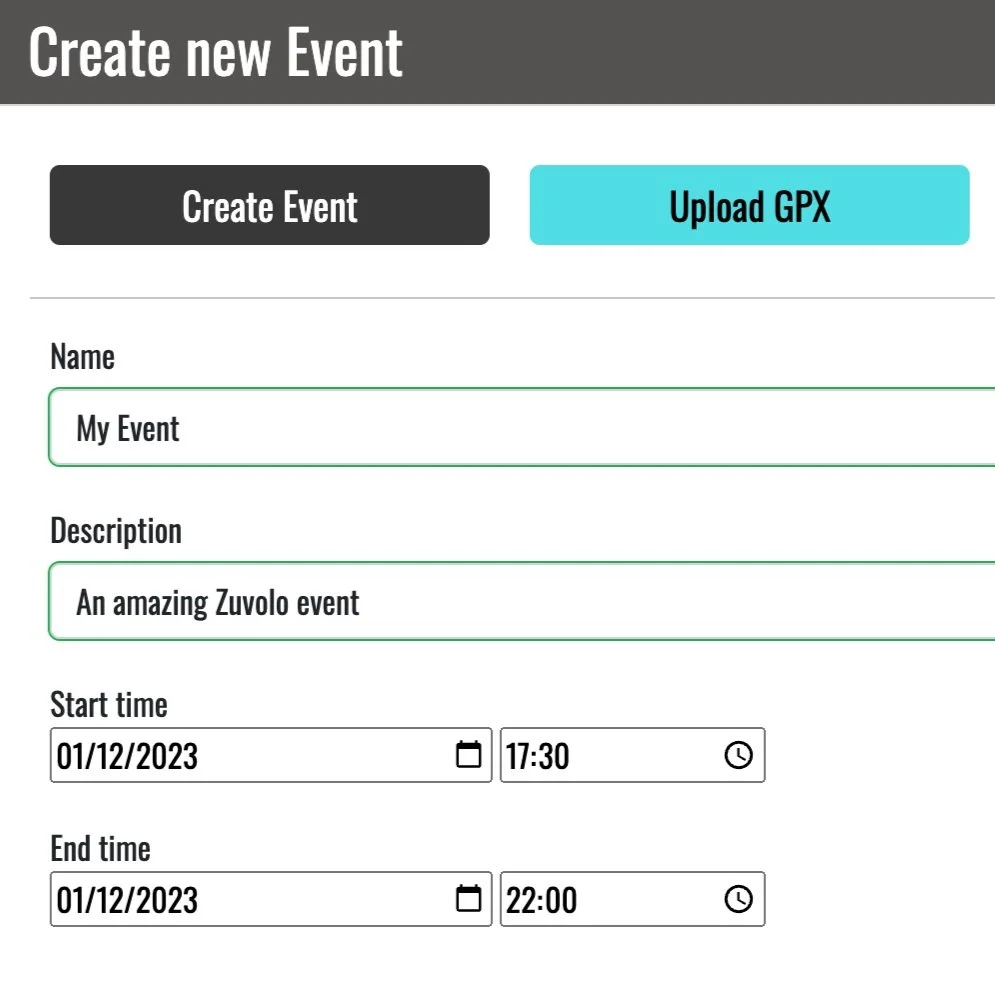
Ensure you have already created your GPX route using another application. After selecting the “Upload GPX” button, choose your file and upload it into Zuvolo.
4. Select “Create Event”

Finish off by selecting the “Create Event” button. You will now have an event with a route. You are now ready to add some Event Markers.
PART II: MANAGING EVENT MARKERS
1. Route Appears

After creating the event, the map appears with your route. Start planning where your markers will be located.
2. Mandatory: Add Start & Finish

Zoom in and right-click to start adding a marker.
First, add your “Start” and “Finish” markers to the map. This is mandatory.
3. Confirm Start & Finish

In the list below the map, select the “Start” and “Finish” markers and SAVE.
4. Optional: Add More Markers

Zuvolo allows for different marker types. E.g., for a landmark, cafe, food location, climbs, restrooms, checkpoints and waypoints.
Save and Return to Manage Event.
PART III: inviting participants

1. Select “Registration Codes”
After successfully adding all your event markers, return to the “Edit Event” screen. Select the “Registration Codes” button.
Zuvolo will automatically have created two registration codes.
2. Reusable Event Code For Participants
Share the Reusable Event Registration Code with all participants.
Ideal for sharing with friends, clubs, and events with no fee.
All participants that register with this code will appear on the Event Map at the time of the event.
3. Reusable Event Code For Staff
Share the Reusable Event Staff Code for all staff involved with an event.
Ideal for sharing with staff such as stewards, marshals, photographers, etc…,
All staff that that register with this code will NOT appear on the Event Map at the time of the event, but will have visibility of all other participants.
4. Unique Registration Codes
Ideal for events and activities where there is participant fee for entry. Each participant will be assigned their own code.
Select the “Add Unassigned Codes” button to generate as many of these codes as is needed.
Once a participant has registered with this code, it can not be used by any other participant.
REGISTERING FOR AN EVENT
1. Option A - Register Before Sign-In
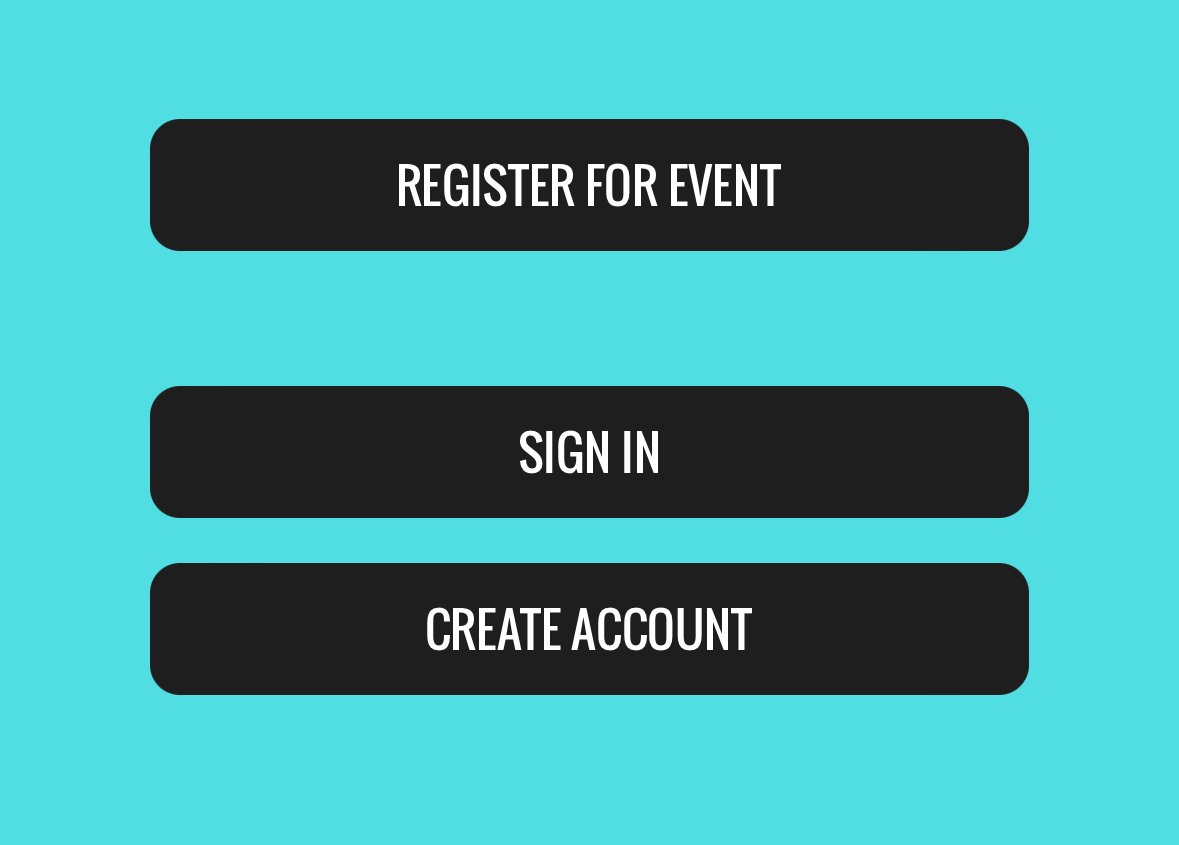
Select “Register For Event” followed either by signing in with an existing account, or creating a new one. Ideal for participants that have just downloaded the app for the first time.
2. Option B - Register After Sign-in
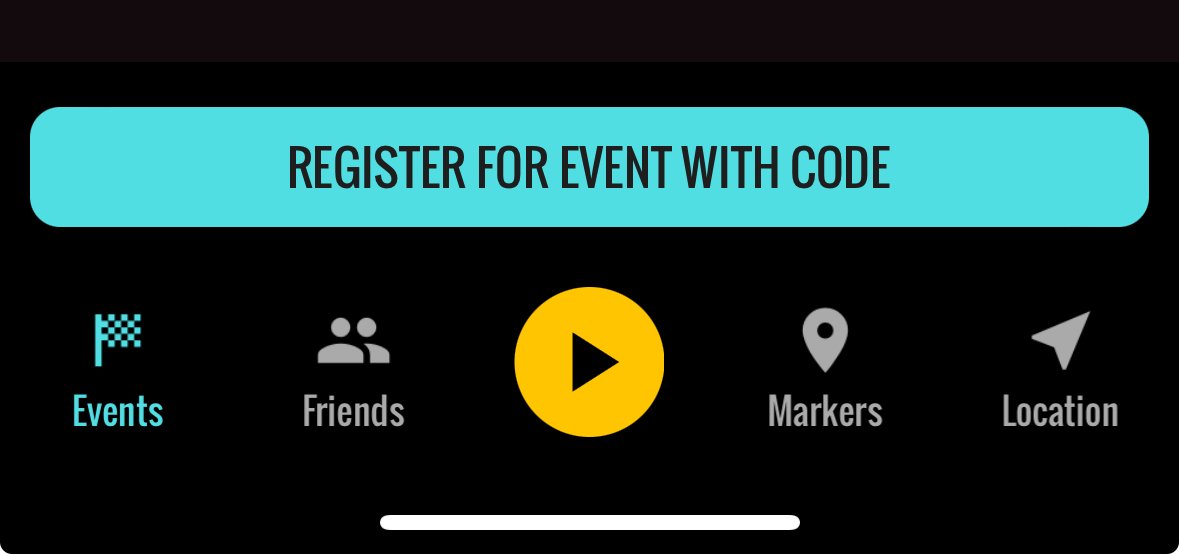
After successfully signing in, select the “Register For Event With Code” button
3. Enter Registration Code

Select the “Submit” button to complete the registration process.
4. Event List Updates
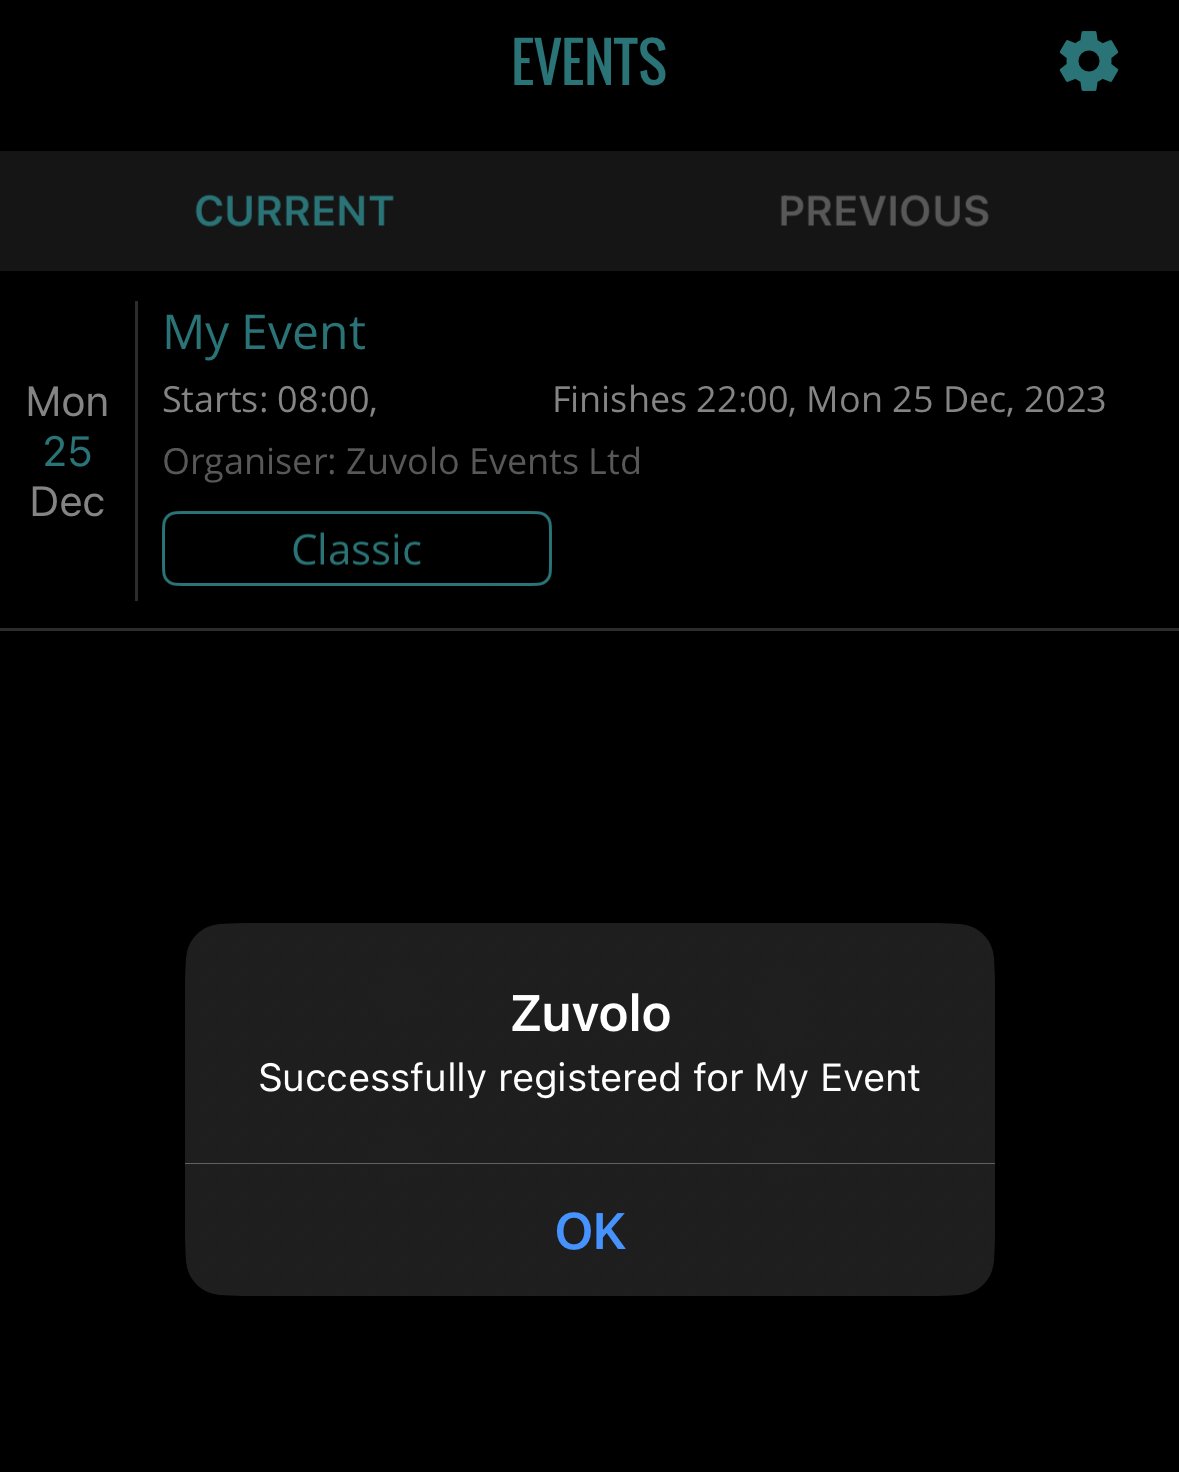
If the code is valid, the registration will be successful. The event will appear in the Event List.
STARTING & FINISHING AN EVENT
1. Select Yellow Start Button
Select the yellow START button followed by the “Start or Continue” event option.
2. Choose Your Event

A list of events will appear. Choose the event you wish to start (or continue).
3. Event Mode Starts
You are now in the event and you will be sharing your location with the organiser ands other participants. Your friends will appear on the map with their initials. Other participants will display as anonymous blue dots. The yellow Start button changes to a red Stop button.
4. Retiring From Or Finishing An Event
Select the red STOP button and choose to Retire or Finish.
Choose to Finish if you have in fact reached the Finish location. Choose to Retire if you had to exit the event before reaching the finish.
You will stop sharing your location with the organiser.
MONITORING AN EVENT AS A PARTICIPANT
1. View The Map
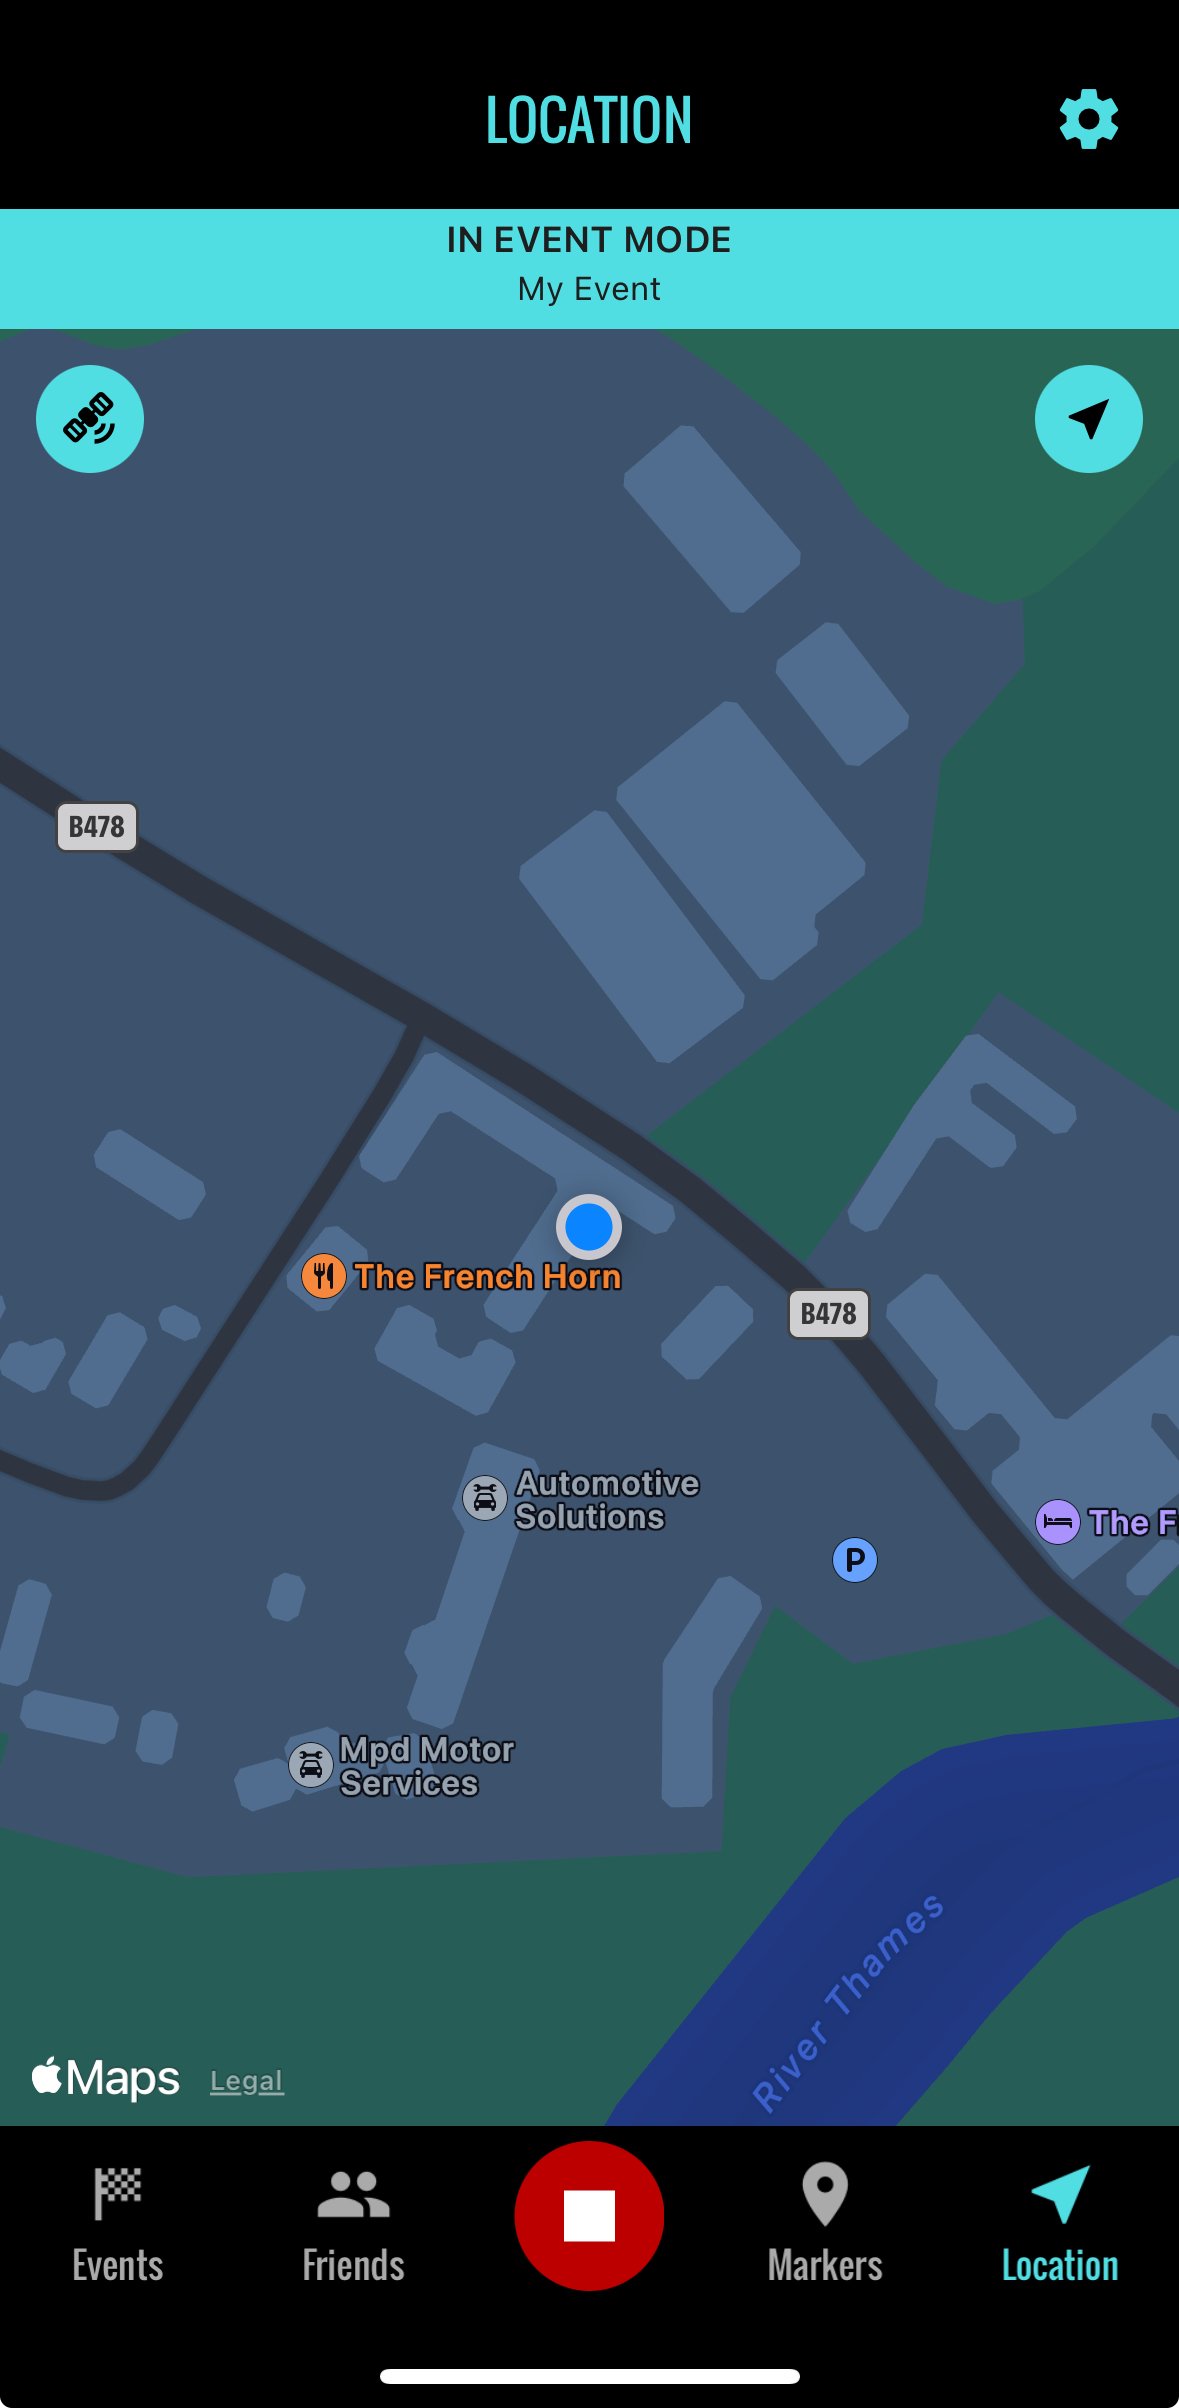
Select the “Location” tab to see the map. The banner at the top of the map will show that you are in Event Mode.
2. Friends Display With Initials

If your friends are in the event they will appear with initials on a blue icon.
3. Non-friends Are Anonymous

All other participants will remain anonymous and appear as blue dots.
4. Friends Quick Search

To find Friends in an event, on the map select the black arrow to the left of the map. The number in the arrow shows how many friends are in the event. Tap on the arrow to see a list. Tap on any friend in that list to quickly find their location on the map.
5. Connection Issues

If a friend has not sent a location update for more than 1 minute, they will appear grey on your map at their last known location. As soon as they can send location updates, they will change back to blue on your map at their current location.
MONITORING AN EVENT AS AN ORGANISER
Important: The Zuvolo portal is designed to be used on a desktop computer and not on a mobile phone device.
1. The WEB Control Room

Using the web portal, from your Events list select the “Event Control Room” icon. A map will display, with the route, the list of participants, and a status dashboard.
2. The Participant List

The list displays the names of participants, their duration in the event, and battery status.
Blue icons denote active participants. White icons are participants yet to start. Grey icons denote participants with connection issues.
Black icons denote participants that have retired. Green icons denote participants that have finished.
3. The Dashboard

The dashboard provides an instant view of the status of all participants in the event. Tapping on any of these numbers on the dashboard will automatically filter the participant list accordingly.
4. The Map

The map shows the entire route and the locations of all participants and event markers.
Tapping on a name in the participant list will zoom in on the location of that user on the map.
VIDEO: Creating AN EVENT
Watch a video showing how quick and simple it is to create an event that is ready for sharing.